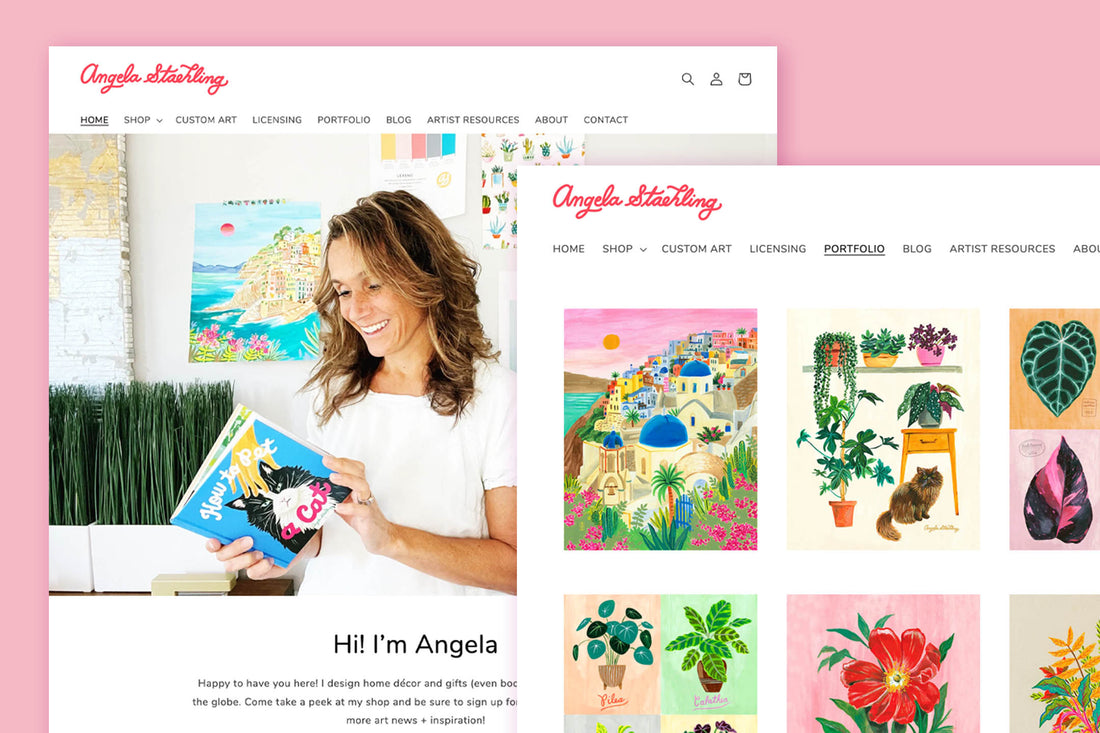
Setting up an art licensing website is a really important step in establishing an online presence and showcasing your work to a broader audience. Your website is going to be the primary way you’ll showcase your work online – so think of it as your digital portfolio.
But where do you start? Do you need to employ a web designer?
Thankfully, in the age we find ourselves, DIY websites are very user-friendly. Companies like Squarespace offer ready-made templates and you simply add your own info and photos to that template. You can also adjust the colors to suit your vibe.
Should you be feeling more adventurous, you can change up entire template sections – it caters to all levels. Often it just takes a little playing around to become better acquainted with the site.
Okay! Let’s take a step-by-step look at what you need to do to set up your art licensing website.
1. DEFINE YOUR GOALS:
Before you start building your website, it's important to determine what you want to achieve with your website. You may simply want to showcase your portfolio. Perfect! Or, you may also wish to sell some artwork (as I do). It’s important to understand these goals upfront as it does play into the type of website platform you’ll need to select. More on that below.
2. CHOOSE A DOMAIN NAME:
If you already have a brand name or have been thinking about creating a brand name, this is where you’ll want to bring that into the picture. Perhaps it’s your name (like me) or you may want to use something completely different.
It’s a good idea to do some Google research with any branding ideas to check no one else is using that name in a similar industry and that the domain name is even available. Then, when you’re ready, you can search and purchase the domain name on any website that sells them (GoDaddy, Namecheap, Squarespace to name just a few)
TIP: If you’ll be choosing a hosting platform straight away it’s easiest to buy the domain name from the hosting platform. It’s far easier to connect the two this way.
3. SELECT A WEBSITE PLATFORM:
There are many website builders and platforms available that are super user-friendly. They offer varying price ranges but most are very affordable. Some basic ones are even free.
Some popular options include WordPress, GoDaddy, Wix, Squarespace, Weebly, Shopify, and WooCommerce. Choose one that suits your technical skills and budget.
Most platforms come with customizable templates so you really only need to insert your own info into the template and you instantly have a beautiful-looking site. If you’re more savvy you can change up templates and play around a little more.
FUN FACT: If you’re an Adobe Creative Cloud subscriber, you can access a free portfolio website with their Adobe Portfolio software! So, go check it out if you don’t already know about this exciting feature.
I came from Squarespace and I absolutely loved the ease of designing my previous website over there. I then moved to Shopify because I wanted to sell artwork but it’s not as simple as I found Squarespace. Of course, now Squarespace does have a storefront option!
There are pros and cons to all the different platforms. You just need to decide what works best for you.
If you’re still not feeling good about setting up a site yourself, you can look into hiring someone to do it for you. You could ask a family member who’s savvy to set you up a basic site or you can check out Upwork.com or Fivrr.com to find a variety of freelancers who can create a website for you.
4. DESIGN YOUR WEBSITE:
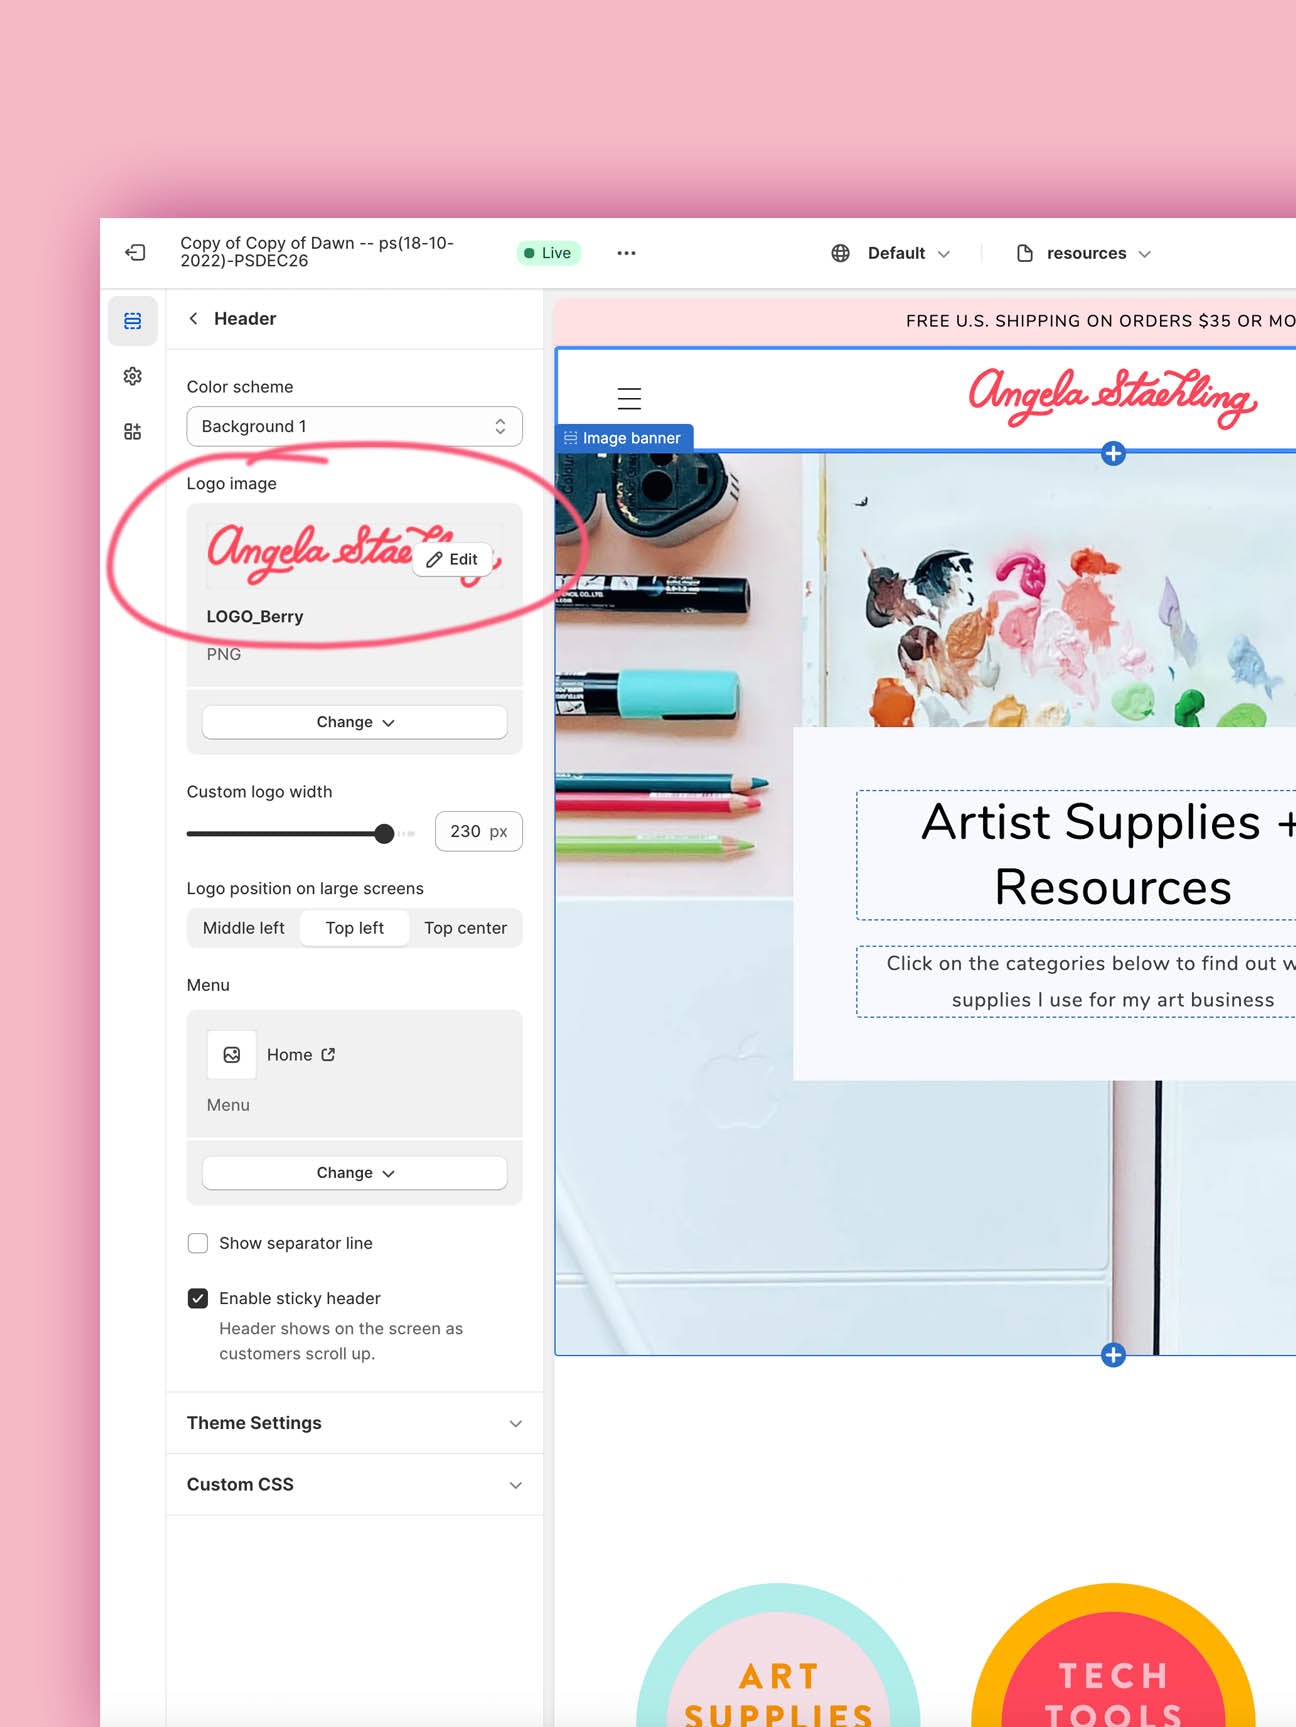
As mentioned, many of these platforms offer customizable templates. You can just use the template you’re given with your own assets. However, you’ll definitely want to customize the color scheme to reflect your brand’s unique style.
Thankfully, there are almost always step-by-step tutorial videos to help you navigate anything you’re unsure of.
Okay, this is what I believe you need on a basic portfolio website:
-
An ABOUT page with your biography and artist statement.
-
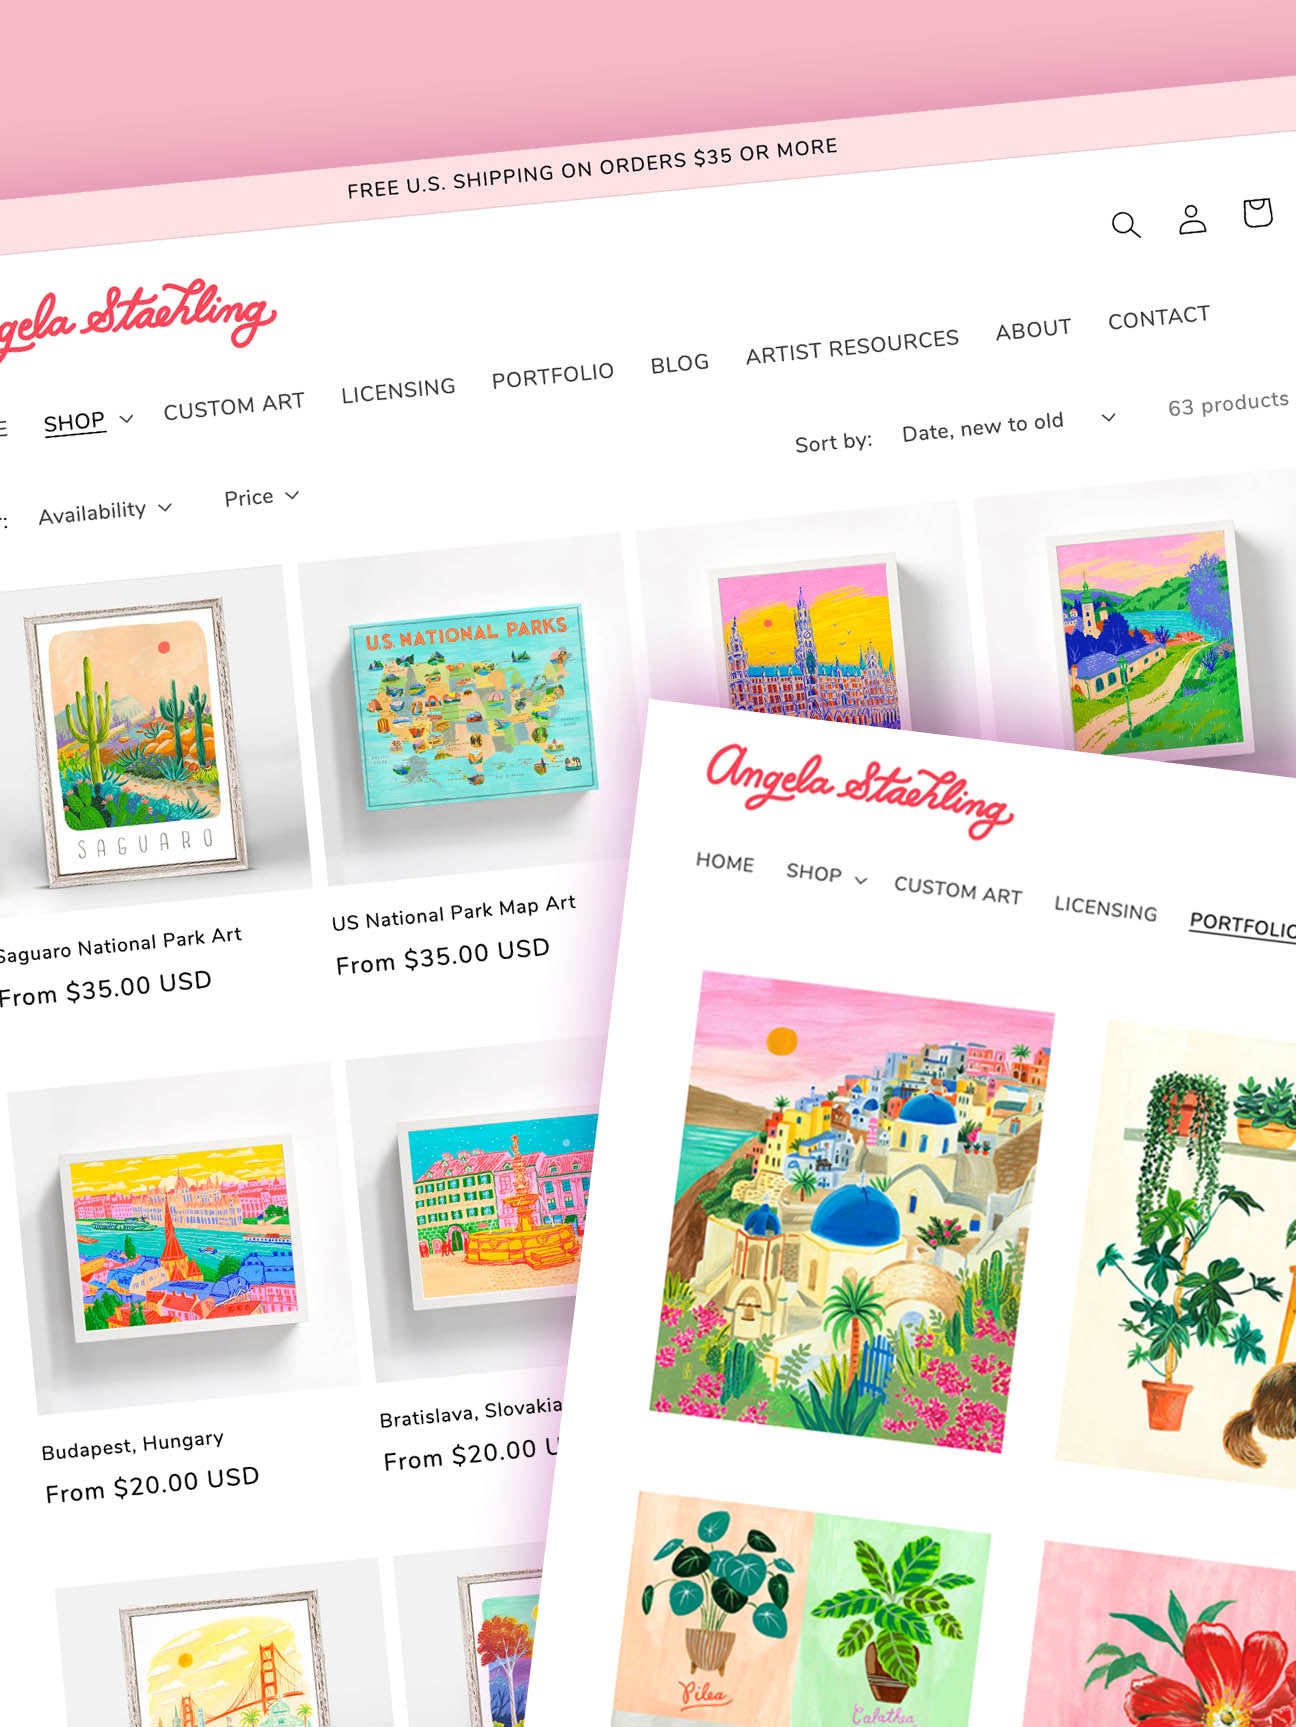
A PORTFOLIO page displaying your artwork, organized into categories or series.
-
A CONTACT page with your contact info or a contact form
But I also love these other options:
-
A NEW page
-
A LICENSING page
I don’t personally have a “new” section but I’m seeing it a lot more lately and I think it’s a fabulous idea as it instantly lets your viewers know that your latest artwork can be found there. This will save them time finding your latest and greatest art.
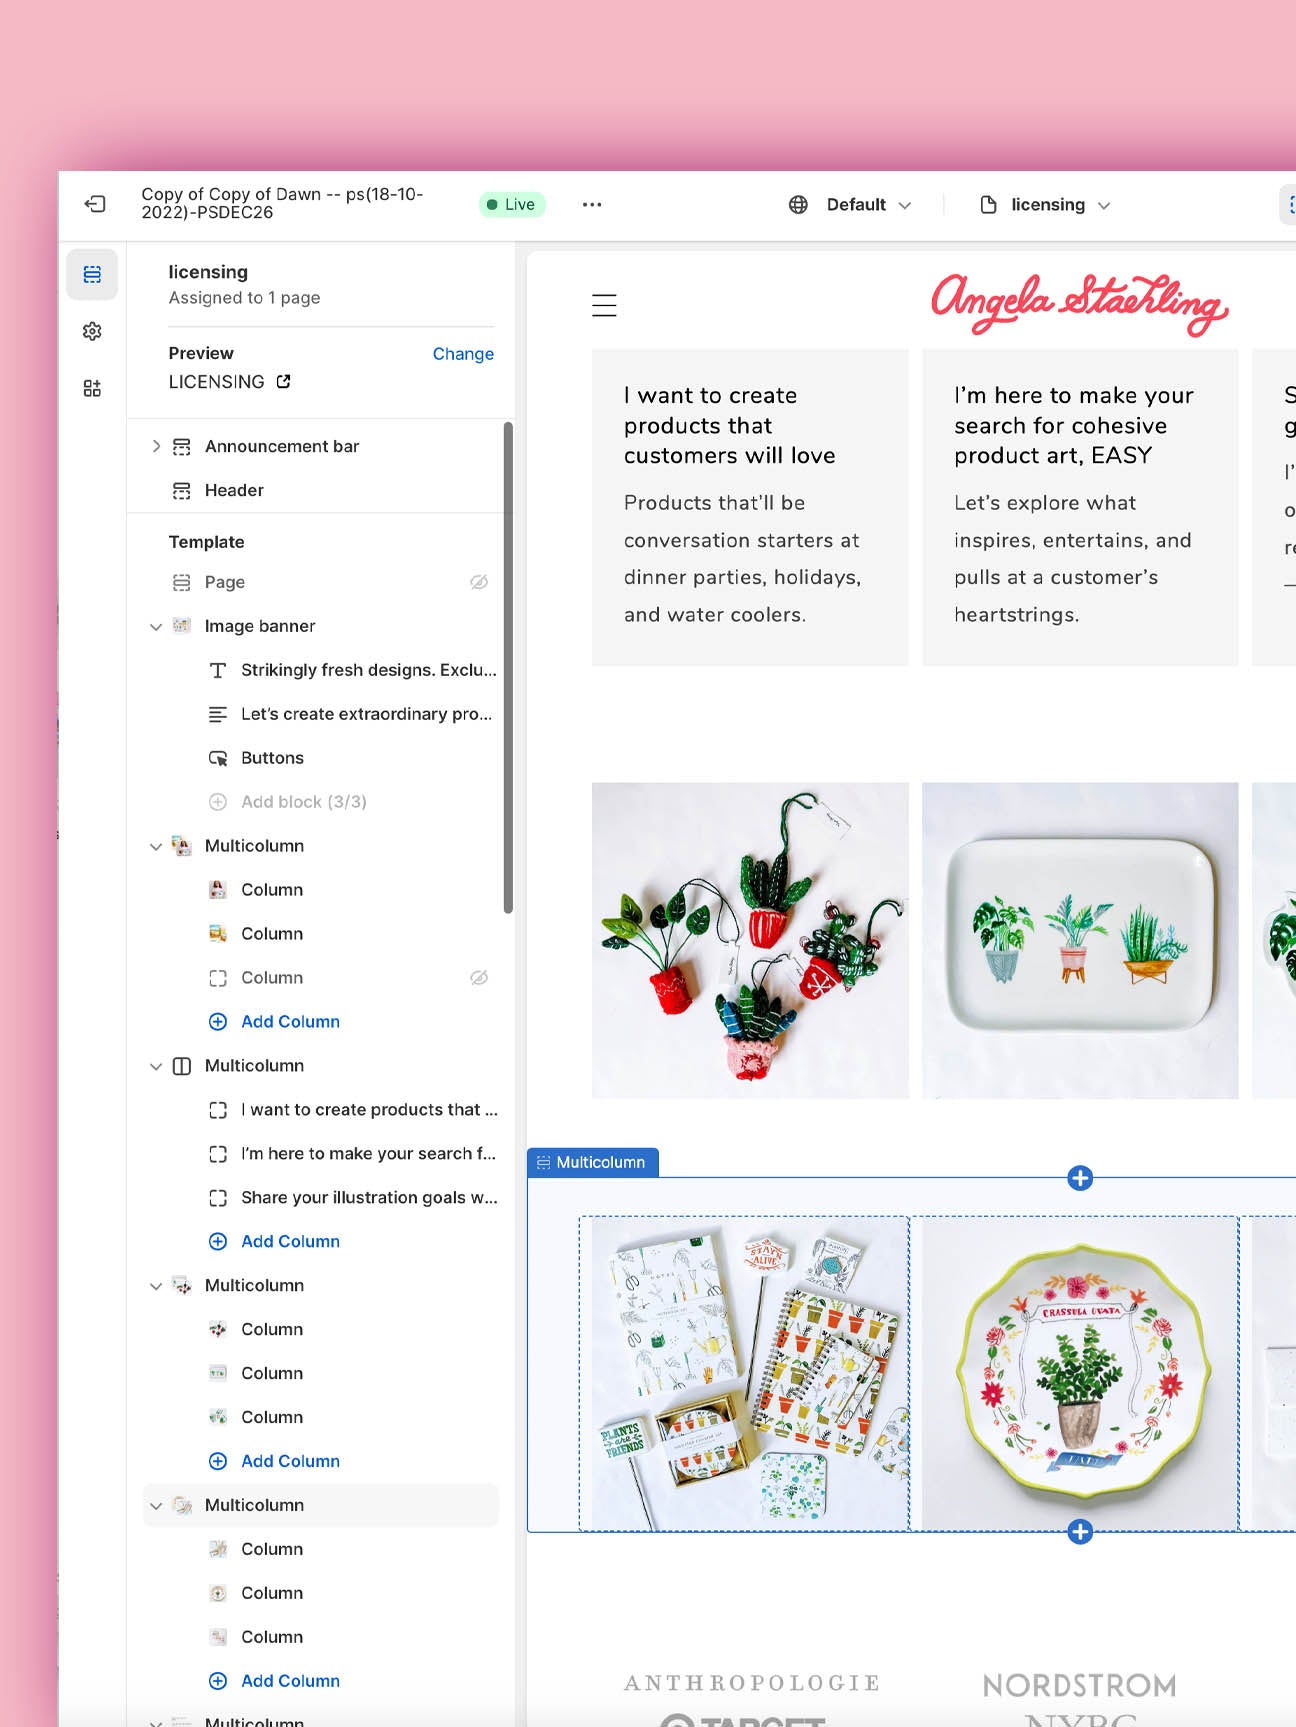
I do have a Licensing section in my menu. The goal of setting up a tab for licensing is to make it easy for a potential licensing company to see that you are, in fact, a licensed artist - whether you've gotten your first licensing deal or not.
On my Licensing Page, I've provided some photos of past projects and text on how I collaborate with my licensees, and when you click on that red “Licensing Inquiries” button it takes you to my basic contact page.
If you have different styles of art, like me, try to pick your favorite one or two styles that you enjoy creating the most and use these styles as the main focus of your website.
On my previous website, I used to have two portfolio sections under my main “Portfolio” tab – these were called “Boutique” (my newer, more contemporary art) and “Classic” (all of my older, more traditional art.)
Each portfolio had similar categories, such as floral, travel, zodiac, etc., even though they had very different styles.
FINAL TIP! And it’s an important one. When uploading images of your artwork remember to either use low-res images (that are still clear) or watermark them to protect them from copyright.
9. SHOW THEM HOW TO REACH YOU:
These days all website templates should help you to link your social media profiles (if you have them). Contact form templates will allow you to enter the email address you’d like to have any messages forwarded to.
10. TEST AND OPTIMIZE:
Before launching, thoroughly test your website to ensure everything works correctly. Check for broken links, and spelling errors, and ensure it's mobile-friendly. There’s usually a place on a website platform where you can “view mobile version” and adjust it accordingly.
Now, send it to a friend to proof! Get them to send you a test message through the contact page as well.

11. LAUNCH YOUR WEBSITE!
Once you're satisfied with the design and content it's time to make your website live. Connect your new domain name (the web address) to your hosting platform, and ensure that everything is functioning as expected. If any of this sounds complicated the hosting platform is always happy to help you launch!
12. REGULARLY UPDATE YOUR WEBSITE:
Keep your website up to date with your latest work and news. It’s very simple to do these updates yourself which gives you full control of your own website.
As artists, our work will continue to change over time. But you can update a website instantly, whenever you feel the drive. You might even get super inspired to create a blog or even start a YouTube channel with some “process” videos of you at work.
Don’t forget to link your website address everywhere! For example, add it to your social media profiles and into the signature of your emails. 💌